What Are Signs That My Actuator Valve Is Not Working Correctly?

Actuator Valve

With the proper prevention and maintenance techniques, irrigation valves are highly reliable and can last for years. With this in mind, valves can become difficult to troubleshoot, due to the numerous amount of parts that might be causing the problem or malfunction. By learning how the irrigation valve works, you can be better prepared to troubleshoot almost any problem.

Understanding The Importance Of An Actuator Valve

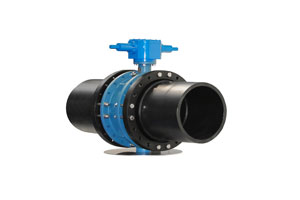
An actuator valve is often powered by a motor. The motor is used to convert electrical energy into a mechanical torque. Once the desired level of torque is acquired, the valve is then opened or closed. When used within an irrigation system, the actuator valve is often one of the highest operating valves. With this structure in mind, troubleshooting an actuator valve malfunction often starts with one of the following symptoms.

  • Water is not running from one end of the irrigation system to the other.
  • Flooding is occurring due to built-up pressure.
  • Water pressure is not at the correct levels.
  • Debris or other contaminants are showing-up in the water.
  • Loud noises, such as hissing or clanking sounds, are being emitted from the valve.
  • The actuator valve is not opening or closing completely.

If you have noticed any of the above symptoms, then your actuator valve might not be functioning properly. To help you further troubleshoot the malfunction, we have gathered together a few potential causes and solutions.

  • Check the electrical signal to the valve. — If the electrical signal (voltage) is too low, then the actuator valve will have difficulty opening and closing. A volt-ohm meter can be used to check the voltage between the irrigation controller station terminal and the ground. Review your manual to determine what the appropriate voltage reading; and carefully make adjustments as needed.
  • Check for valve contamination. — A valve’s direct connection to the main water line can make it more susceptible to contamination from debris, dirt, or contents within non-potable water. To help reduce the risks of contamination, install a filter to keep contaminants away from the valve.
  • Clean the screen or filter. — If you have installed a filter to protect your valve from contaminants, then you need to clean it on a regular basis. Failing to clean the protective filter or screen can result in a malfunctioning valve.
  • Thoroughly inspect the valve for damage. — Check for loose parts, dents in the valve, and other signs of wear-and-tear. If your valve is damaged, then it won’t be able to properly function. Carefully replace all damaged parts or the entire valve to resolve the issue.

With these helpful tips in mind, you will be able to properly troubleshoot your actuator valve malfunction. For further help, contact a member of W.P. Law. The entire team is dedicated to providing valuable insights and products to help companies achieve their irrigation goals.

How Much Will Installing An Irrigation System Damage My Lawn?

Lawn Irrigation System

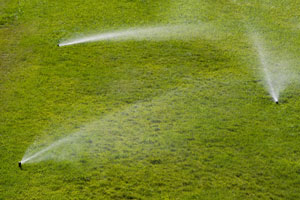
If you have a well-established lawn, then chances are you want to keep it healthy and looking great throughout the four seasons. Instead of spending countless tedious hours manually watering your lawn, dragging hoses everywhere, and worrying about what will happen while you are away on vacation, you should consider an automated irrigation system. However, if a fear of damaging your lawn via the installation process is holding you back, then there are a few things that you need to know.

Steps To Avoid Lawn Damage During Irrigation System Installation

There are a few precautionary steps that you can take to mitigate damaging your lawn during an irrigation system installation.

1. Consider the time of year.

Early spring and fall are the perfect times to install an automated irrigation system. During these seasons the soil has a higher moisture content, which makes digging and restoration processes significantly easier. Additionally, the higher moisture content often means that the soil is healthier and ready to grow new grass in abundance.

2.Make sure that the type of equipment used matches your specific lawn requirements.

A trencher and plow (or vibratory plow) are typically used to install an irrigation system. Both types of equipment have their pros and cons; however, the vibratory plow tends to be less destructive to the surface of the lawn. Make sure that you speak with an irrigation expert before you begin to dig.

3. Set aside established grass and sod should be carefully set aside.

If you have established grass or sod, there is no reason that it should be damaged when you install an irrigation system. Ask your chosen irrigation expert to carefully set the grass or sod aside. During the excavation process, the dirt should be set aside on a piece of plywood or tarp, which will make the burial process much easier and cleaner. After the installation is complete, left over dirt should be buried or carried away, so that the sod and grass can be gently replanted.

4. Make sure that you soak the entire lawn afterwards.

After your automated irrigation system has been installed, it is a great idea to thoroughly soak the entire lawn. The additional water will help new seed take root, and it will minimize any additional stress to the lawn.

With these helpful tips in mind, your lawn can be protected while you install a convenient automated irrigation system. To learn more about irrigation installation tips, or for help choosing the perfect system for your lawn, contact a member of W.P. Law today!

How Do I Prepare My Farm Irrigation System For Winter?

Agricultural Irrigation System

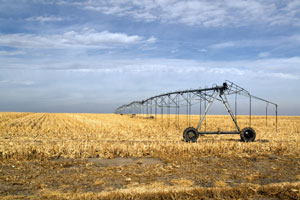
Once the growing season is over and the harvest has been completed, it will be time for the winter winds to come howling onto your farm. Don’t be caught unprepared; make sure that your farm irrigation system is properly prepared for the winter. From insulating assets to protecting your valves, we have four crucial tips to help you winterize your large-scale irrigation system.

4 Tips To Successfully Prepare Farm Irrigation Systems For Winter

Before the first frost and well before the snow begins to fall, you should take the time to properly winterize your farm’s irrigation system. Failing to winterize your irrigation system can result in frozen pipes and broken equipment.

Tip #1. Insulate Your Assets

The farm irrigation winterization process starts by shutting off the outdoor water supply. Next, you should protect the main shut off valve from the soon-to-be below freezing temperatures. One of the easiest ways to protect the main shut off valve is through insulation. In addition to insulating the main shut off valve, you will need to insulate any above ground piping. Before you apply the insulating tubes of self-sticking foam insulating tape, make sure that all of the water has been drained from the pipes. If water is left in the pipes, then they might freeze or burst during freezing temperatures.

Tip #2. Drain Any Pipes

As mentioned in the preceding tip, make sure that you drain any and all outdoor pipes that will not be used during the winter. Water can easily expand and freeze during extreme temperatures. If the water is left in your pipes, then regardless of insulation, they could freeze and burst. To drain your pipes use an automatic or manual drain valve. Take the extra time needed to drain any long, industrial watering hoses before storing them for the winter.

Tip #3. Protect Valves and Backflow Preventers

Make sure that your backflow preventers and all above ground valves have been properly insulated. The air vents and rain outlets on the backflow preventers should not be blocked by insulation. Insulation foam or tape can and should be used on these parts.

Tip #4. Store Any Large Pieces of Equipment Indoors

Whenever possible, your large pieces of farm irrigation equipment should be safely moved indoors. Subjecting your irrigation equipment to the cold winter temperatures can reduce longevity and cause unwanted damage.

With these easy-to-complete winterization tips in mind, you and your farm irrigation system will be well prepared for Old Man Winter. For additional farm irrigation tips, contact one of the irrigation experts at W.P. Law.

What Role Does Welding Play In Maintaining a Sanitary Piping System?

Welding a Piping System

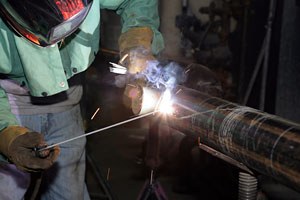
Welding plays an important role in properly maintaining a sanitary piping system. Strengthening joints, improving corrosion resistance, and enhancing piping structures are just a few of the benefits that proper welding techniques can achieve. In this vein, there are there are certain tactics that should be carefully employed when welding a pipe.

Important Factors To Consider When Welding A Sanitary Piping System

There are several important items that should be carefully considered before you begin the process of pipe maintenance or other welding activities. After all, a failure to properly weld a pipe can result in leaks, weaknesses, corrosion, and other costly mistakes.

  • Consider the importance of a clean environment. — Welding pipes made from stainless steel will require you to use a dedicated set of brushes, files, and grinders. These tools should never touch carbon steel or aluminum. When it comes to welding and maintaining sanitary piping systems, cleanliness is critical. Trace elements of foreign materials can all too easily be incorporated into a weld joint. If these foreign materials are accidentally welded into the joint, then reduced strength and corrosion resistance might occur.
  • Use best practice welding techniques for optimized results. — The welding process should only be completed by professionals whom are capable of achieving high-quality results. The actual act of welding will play a crucial role in the control of heat input and cooling, which directly correlates to the pipe’s ability to withstand distortion and corrosion.
  • Monitor and actively combat the harmful effects of sensitization. — Sensitization of a piping system occurs if there is an extensive loss of corrosion resistance. It is greatly affected by the temperatures at which the weld cools, as well as the filler metal and base material.

As seen in the above examples, welding plays a critical role in the maintenance of a sanitary piping system. A failure to conduct proper maintenance, or utilize best practice approaches to welding, can result in costly piping damages. For additional information and tips on maintaining sanitary piping systems, contact one of the experts at W.P. Law. For over 40 years, W.P. Law has been at the forefront for providing advanced piping maintenance solutions.

Stay Connected

Sign up today to keep up with the newest information from one of the Southeast’s leading suppliers of fluid handling equipment!

Interested In