

Is a Centrifugal Pump the Right Choice for Your System?

Centrifugal pumps play a critical role in keeping irrigation and water systems running efficiently and choosing the right one is key. The wrong pump can lead to poor performance, wasted energy, and costly repairs over time. If you’re considering a centrifugal pump, it’s important to understand how it works and whether it’s the right fit for your specific needs. Here’s a closer look at what centrifugal pumps do best, where they’re most commonly used, and how to determine if one is right for your system.

What Is a Centrifugal Pump and How Does It Work?

blue and orange centrifugal pump

A centrifugal pump is one of the most common types of pumps used in irrigation and water systems. It moves water by using a spinning component called an impeller, which creates the pressure needed to keep water flowing through the system.

Here’s a simple way to think about it:

  1. Water enters the pump through the inlet
  2. The impeller spins and speeds up the water
  3. That speed is converted into pressure
  4. The pressurized water is pushed out through the discharge line

Thanks to their simple design, reliability, and efficiency, centrifugal pumps are a popular choice for both residential and commercial water systems.

Common Applications in Water Pumping Systems


Centrifugal pumps are highly versatile and used across a wide range of water pumping applications. You’ll often see them in lawn and landscape irrigation systems, as well as in agricultural irrigation setups where consistent water flow is essential. They’re also commonly used for water transfer and circulation, in booster systems to increase water pressure, and in larger commercial or industrial operations. Their ability to move large volumes of water efficiently makes them a reliable and popular choice for many types of irrigation pump systems.

How Pump Efficiency Affects System Performance

Efficiency plays a major role in how well your system performs. A properly sized and installed centrifugal pump will deliver consistent water pressure, reduce energy consumption, minimize wear and tear on system components, and improve overall system reliability. On the other hand, an improperly selected pump can lead to inefficiencies like pressure loss, cavitation, or excessive energy use. That’s why understanding centrifugal pump efficiency is key when designing or upgrading your system.

Key Factors in Pump System Design and Selection

Not all pumps are created equal, and selecting the right one depends on your specific system requirements. When evaluating a pump selection guide, consider the following:

  • Flow rate requirements – How much water your system needs to move
  • Pressure requirements – The distance and elevation water must travel
  • System size and layout – Including pipe diameter and length
  • Water source – Clean water vs. water with debris or sediment
  • Usage frequency – Continuous operation vs. intermittent use

A well-planned pump system design helps ensure efficient performance, reduces unnecessary wear and tear, and extends the overall lifespan of your equipment. It also minimizes the risk of costly repairs and downtime, keeping your system running reliably when you need it most.

When a Centrifugal Pump Is the Right Choice

A centrifugal pump is often the best choice when you need to move a high volume of water at a steady, consistent flow rate. They work especially well in irrigation systems with constant demand, applications that use relatively clean water, and setups where simple, reliable operation is important. They’re also a strong option when energy efficiency is a priority.

That said, centrifugal pumps aren’t ideal for every situation. Systems that require high suction lift or need to handle water with heavy debris or sediment may require a different type of pump to perform effectively. If you’re unsure which solution is right for your system, talking with a professional can help you make a more informed decision.

Make the Right Pump Choice with WP Law

Choosing the right pump plays a critical role in your system’s overall performance and long-term reliability. While a centrifugal pump can be a powerful and efficient solution, it only delivers results when it’s properly matched to your system’s specific demands.

That’s where WP Law comes in. Our team has the expertise to guide you through pump selection, system design, and irrigation solutions, helping ensure your setup operates efficiently and holds up over time. If you’re planning a new system or upgrading an existing one, reach out to WP Law to speak with an expert and get the right solution in place from the start.

How to Test for an Irrigation System Leak

irrigation system leak

Small irrigation issues can lead to big water bills and serious landscape damage if left unchecked. If you’ve noticed soggy patches, an unexplained spike in your water usage, or struggling plants, it could be a sign of a leak. Learning how to test for an irrigation system leak can help you stop problems before they escalate.

Here’s what to look for, how to troubleshoot it yourself, and when to call in the pros for help.

Signs You Might Have an Irrigation Leak

Leaks in your irrigation system aren’t always obvious at first. Here are some red flags that could indicate a leak in irrigation system components:

  • Wet or spongy areas in your yard, even during dry weather
  • Sudden drop in water pressure or underperforming sprinkler zones
  • Unexpected increases in your water bill
  • Visible water pooling near sprinkler heads or valves
  • Uneven plant growth — some areas are thriving while others wilt

These issues can develop slowly or appear after heavy use, winter freeze damage, or accidental line breaks.

DIY Leak Detection Tips

Before you call a professional, try these simple ways to test for an irrigation system leak yourself:

  • Turn off all water inside your home and monitor your water meter. If it’s still running, you may have an outdoor leak.
  • Check your controller to ensure zones are turning on and off properly.
  • Walk your irrigation lines and sprinkler heads, watching for bubbling or moisture around connections.
  • Inspect each zone by running it separately and looking for drops in performance or visible puddles.

Need to isolate the problem more precisely? Shut off the system and test valves or lines individually using your in-ground sprinkler shut off valve or manual zone control.

How to Check for Leaks in Valves and Lines

If the problem isn’t visible at the surface, your leak could be below ground. Here’s where to look:

  • Sprinkler valves: Open valve boxes and check for damp soil, rust, or hissing sounds.
  • Lateral lines: Soft or sunken spots in your yard often point to a leak in irrigation system piping.
  • Sprinkler heads: Cracks in heads or broken seals can leak continuously, even when the system is off.
  • Backflow preventers: These should remain dry. Leaks here may indicate internal seal failure.

If you suspect a break but can’t pinpoint the exact location, irrigation leak detection tools (like electronic line locators or acoustic sensors) can help. These tools are typically used by pros but can save time and money.

When to Call a Pro for Leak Repair

If DIY leak testing isn’t turning up answers, or if you’ve confirmed a leak but don’t have the tools or time to dig, it’s best to call in a professional. This is especially true if:

  • The leak is underground or near your home’s foundation
  • You’re unsure how to fix the issue without damaging your system
  • You need help with sprinkler line repair or pressure regulation

WP Law offers expert troubleshooting and repair for residential and commercial irrigation systems. We can locate the source of the leak, recommend the right fix, and help prevent future issues. That includes things like a cracked lines, faulty valves, or aging controllers.

Stay Ahead of Leaks with WP Law

Even a small leak in your irrigation system can lead to gallons of wasted water and costly repairs down the line. Regular testing and quick action are key to protecting your landscape — and your wallet.

If you’re unsure whether your system is leaking or need help with irrigation leak detection, reach out to the team at WP Law. We’re here to help keep your system running efficiently all season long.

Why Is My Grass Turning Yellow?

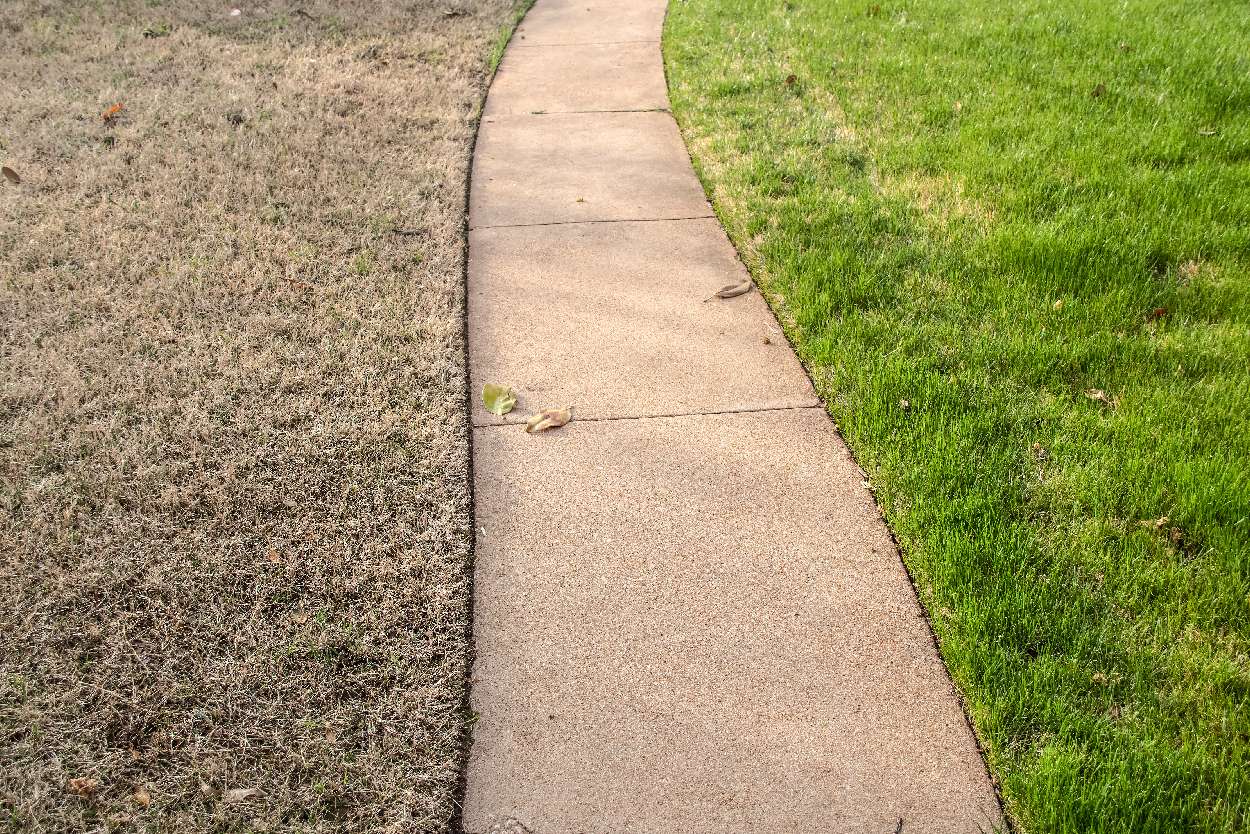
grass turning yellow

Few things are more frustrating than watching your once-green lawn turn patchy and yellow. If you’re asking yourself, “Why is my grass turning yellow?” — you’re not alone. This is one of the most common lawn care concerns, especially in early spring as turf transitions out of winter dormancy.

Luckily, yellow grass isn’t always a sign of permanent damage. In many cases, a few simple adjustments can restore your lawn’s vibrant green hue. Let’s explore the top causes of yellow grass, how to tell if your lawn is dormant or dead, and what you can do to fix it.

Common Causes of Yellow Grass

Discoloration in turf is often a sign that something’s off in your soil, irrigation, or lawn care habits. The most common culprits behind grass turning yellow include:

  • Overwatering or poor drainage: Constantly soggy soil can suffocate roots, causing yellowing and even frost damage in cooler months.
  • Underwatering: Dry, brittle soil limits nutrient absorption.
  • Improper mowing: Cutting grass too short (scalping) weakens the plant.
  • Dull mower blades: Torn, jagged blades damage grass tips, leading to yellow or brown edges.
  • Fertilizer burn: Applying too much nitrogen at once can chemically scorch grass.
  • Pet urine: High nitrogen concentration can cause spotty brown grass patches.

Identifying the cause is the first step to fixing the issue — and preventing it in the future.

How to Fix Yellow Grass Quickly

If your lawn is looking a little lackluster, here are a few immediate steps to help bring back that healthy green color:

  • Check your watering schedule: Aim for deep, infrequent watering (about 1″ per week) including rainfall.
  • Aerate compacted soil: Loosen roots for better oxygen and water flow.
  • Test your soil: Yellowing may signal nutrient deficiencies or a pH imbalance.
  • Use slow-release fertilizer: This helps prevent overfertilizing and reduces the risk of burning.
  • Sharpen mower blades: Clean cuts promote faster healing and less discoloration.

Depending on your grass type, the lawn may bounce back in just a few weeks with the right care.

Is Your Grass Dead or Dormant?

Not all yellow or brown grass is dead. It may just be dormant! Cool-season grasses often go dormant during hot, dry spells, while warm-season grasses may turn yellow or tan in colder weather.

Here’s how to tell the difference:

  • Try the tug test: Gently pull on the grass blades. If they resist and stay rooted, it’s likely still alive.
  • Look at the crown: If the base of the blade near the soil is white or light tan, there’s still life.
  • Watch for regrowth: New green shoots after watering or warming temps mean your grass is waking up.

If you’re not sure whether you’re dealing with dormancy or death, WP Law can help assess the condition and recommend a tailored recovery plan.

Lawn Watering and Fertilizing Mistakes to Avoid

Sometimes good intentions lead to yellow grass. Here are a few habits to avoid:

  • Watering too often with shallow irrigation
  • Fertilizing too early in spring (before grass actively grows)
  • Applying high-nitrogen products during drought or heat
  • Ignoring drainage issues or compacted areas

Being strategic with your lawn care routine (especially in spring) is key to a full recovery.

Bring Back Your Green Lawn with WP Law

A yellow lawn isn’t necessarily a lost cause. With the right approach and a bit of patience, your grass can recover stronger than ever. If you’re unsure about what’s causing the issue or how to treat it, WP Law’s turf specialists are here to help.

We’ll assess your lawn’s condition, soil health, and irrigation system to pinpoint the problem — and create a plan that restores your lawn’s green, lush look. Contact WP Law today for expert lawn care support tailored to your turf.

5 Ways to Fix Yard Drainage Problems

yard drainage

If your lawn turns into a soggy mess every time it rains, poor drainage may be to blame. Standing water, muddy patches, and erosion can be incredibly frustrating to deal with. But on top of that, they can lead to root rot, turf damage, and long-term landscape issues.

Thankfully, there are a number of simple and effective solutions to improve water flow. Here are five proven ways to fix yard drainage problems and protect your lawn from excess moisture year-round.

1. How to Identify Yard Drainage Issues

Before you jump into solutions, it’s important to pinpoint what’s causing the problem. Signs of poor drainage include:

  • Pools of water that linger after rain
  • Grass that turns yellow or dies in low spots
  • Erosion near downspouts or sloped areas
  • Water stains on your foundation or mulch displacement

Walk your yard after a storm and note where water collects or fails to drain properly. Understanding the layout will help you choose the right yard drainage solutions.

2. French Drains vs. Grading Solutions

Once you’ve identified the problem areas, it’s time to consider structural fixes.

  • French drains are ideal for redirecting water away from saturated areas. These gravel-filled trenches use perforated piping to collect and transport runoff.
  • Grading adjusts the slope of your yard to encourage natural runoff. Regrading works best when your entire lawn has poor slope or water flows toward your home.

Both methods are highly effective but may require a professional touch. WP Law offers landscape drainage services that can help you determine which solution is right for your property.

3. DIY Fixes for Poor Drainage

Looking for quick fixes or budget-friendly options? Try these DIY methods to improve drainage in your yard:

  • Extend downspouts to direct roof runoff further from your home
  • Aerate your lawn to loosen compacted soil and increase water absorption
  • Create swales or shallow ditches to guide water to lower areas
  • Use rain barrels to capture excess water for later use

Keep in mind that while DIY options may work for mild issues, larger or recurring problems often require a professional assessment.

4. When to Bring in a Landscape Drainage Expert

Not sure where to start — or worried about long-term damage? That’s when it’s time to call in help. A professional can:

  • Conduct a full drainage evaluation
  • Use laser leveling tools to assess grading
  • Design a customized yard drainage solution
  • Install French drains, sump pumps, or erosion control features

At WP Law, we specialize in diagnosing and solving drainage issues across all types of residential and commercial properties.

Don’t Let Drainage Damage Your Landscape

Water should nourish your lawn; not drown it. Whether you need a quick fix or a full-scale landscape drainage service, addressing drainage problems now can save your yard from major issues down the road.

If you’re tired of soggy spots, standing water, or recurring erosion, let WP Law help. Contact our drainage specialists today to schedule a consultation and get your yard back on track.

Your Month-by-Month Lawn Care Calendar

month by month lawn care

Maintaining a healthy lawn isn’t just a spring and summer task; it’s a year-round effort. Each season brings its own set of needs, and staying on top of them can mean the difference between a thriving lawn and a struggling one. Whether you’re dealing with winter dormancy, muddy spots, or summer drought, a consistent care routine ensures your grass stays strong through all conditions.

Here’s your month-by-month guide to seasonal lawn maintenance in South Carolina and the Southeast.

Seasonal Lawn Care Tasks by Month

Your lawn’s needs shift with the seasons, and staying proactive can prevent common turf issues before they start. Use this month-by-month breakdown to guide your seasonal lawn care routine and ensure your grass stays healthy year-round.

January – March: Prep and Plan

Winter is the perfect time to take stock of your lawn’s condition and plan ahead for spring. While active growth is minimal, there’s still work to be done to protect and prepare your turf.

  • Monitor for winter lawn diseases
  • Avoid walking on frozen or muddy grass
  • Apply pre-emergent herbicide to help control Spring weeds.

April – June: Grow and Feed

Spring kicks your lawn into gear. This is the season for growth, feeding, and early problem-solving. A solid start in these months sets the tone for a strong summer.

  • Fertilize warm-season grasses as they green up
  • Start mowing regularly and sharpen mower blades
  • Check irrigation systems for leaks or winter damage

July – September: Maintain and Protect

Mid-year brings intense heat, drought conditions, and potential pest activity. Focus on maintenance that strengthens your lawn and shields it from seasonal stress.

  • Adjust irrigation schedules during dry spells
  • Spot-treat weeds and address pest issues
  • Raise mower height during high heat

October – December: Wind Down and Winterize

As temperatures drop, it’s time to wrap up your lawn care season and prep for dormancy. Proper winterization can prevent damage and make your spring restart easier.

  • Apply a winter lawn fertilizer (for cool-season grasses)
  • Blow out sprinkler systems before the first freeze
  • Rake leaves to prevent fungal issues
  • Apply pre-emergent herbicide to help control winter weeds.

When to Apply Lawn Fertilizer

Timing is everything with fertilizer. Fertilizing at the wrong time can do more harm than good, while well-timed applications can boost root health, color, and resilience. Knowing when to fertilize based on your grass type and season is key to getting the most out of your lawn care routine.

Apply based on grass type:

  • Cool-season grasses: Fertilize in early fall and late spring
  • Warm-season grasses: Fertilize in late spring through summer

If your lawn is dormant or muddy in winter, hold off — fertilizer won’t absorb properly and can run off into storm drains.

Need help choosing the right product? WP Law can recommend the best blend for your region and turf variety.

Best Time to Water or Mow

Your mowing and watering schedule should shift with the seasons. After all, mowing and watering aren’t one-size-fits-all throughout the year. As your lawn’s growth patterns change with the seasons, so should your maintenance habits. Here’s how to adjust your routine for optimal lawn health:

  • Spring & Summer: Mow weekly and water deeply 2–3 times per week
  • Fall: Reduce mowing frequency as growth slows
  • Winter: Stop mowing when grass goes dormant; water only during dry spells if temps are above freezing

Keep mower blades sharp and avoid mowing wet or frosty turf to prevent compaction or damage.

How to Adjust Lawn Care in Winter

Once your lawn slows down or goes dormant, it doesn’t need as much hands-on care — but that doesn’t mean you should ignore it. Winter lawn care is less about active growth and more about protection. In other words, it’s more important to focus on minimizing stress and protecting your turf from seasonal damage.

  • Aerate in early fall before the first frost
  • Watch for pooling or drainage issues that cause muddy spots
  • Keep foot traffic to a minimum on dormant or frosty grass

If you notice winter weeds or disease, spot-treat as needed and monitor closely so issues don’t carry into spring.

Year-Round Lawn Maintenance Tips

Some lawn care practices stay relevant no matter the month. These tips help you stay ahead of issues and build a lawn that’s not just surviving, but thriving through every season.

  • Test your soil annually to adjust pH and nutrient balance
  • Inspect sprinkler systems quarterly, especially before and after winter
  • Mulch clippings in spring and summer to boost soil health
  • Use seasonal fertilizers based on your lawn’s growth cycle
  • Adjust mowing height during extreme heat or drought

Expert Guidance for Every Lawn, Every Season

Keeping your lawn healthy throughout the year doesn’t have to be complicated — but it does require a plan. Whether you’re battling winter dormancy, summer stress, or just trying to stay on schedule, WP Law has the tools, knowledge, and services to support your turf every season.

Need help putting your lawn care calendar into action? Contact WP Law today for personalized seasonal lawn support tailored to your grass type, soil, and irrigation system.

Does Grass Grow in Winter?

does grass grow in winter

As temperatures drop and lawns lose their lush green color, many homeowners start wondering: does grass grow in winter? The short answer is: it depends. Both the type of grass you have and your local climate play a major role in how your lawn behaves through the colder months.

If you’re in South Carolina or the Southeastern U.S., here’s what you need to know about what your lawn is doing during winter — and how to take care of it.

When Does Grass Stop Growing in Winter?

Grass doesn’t grow year-round. Most grasses enter a dormant or slow-growth phase when temperatures consistently fall below 50–55°F. In South Carolina, this typically happens in late November or early December, depending on the year.

Once this threshold is reached, your lawn won’t need frequent mowing or watering — but it does still need basic maintenance to stay healthy until spring.

What Temperature Stops Grass Growth?

Grass growth largely hinges on soil temperature rather than just air temperature. For most lawns:

  • Warm-season grasses (like Bermuda, Zoysia, or Centipede) stop growing when soil temps drop below 55°F.
  • Cool-season grasses (like Fescue or Ryegrass) may continue slow growth into the low 40s before becoming dormant.

If you’re not sure what type of grass you have, now’s a great time to find out. Remember, how you care for it in winter will differ.

Can You Plant Grass Seed in Winter?

Yes, but it depends on your goals. While traditional seeding isn’t ideal in winter due to cold soil and poor germination rates, dormant seeding is a method that works in colder climates.

Dormant seeding involves planting cool-season grass seed in late fall or early winter, after growth has stopped. The seed lies dormant through winter and begins to germinate once soil temps warm up in early spring.

In South Carolina, this method is best used for cool-season grasses, particularly in shaded areas or lawns with bare spots that don’t recover on their own.

Do You Need to Fertilize Grass in Cold Weather?

In most cases, winter is not the time for standard fertilizer applications. However, applying a winterizing fertilizer in late fall (before your grass goes fully dormant) can help strengthen roots and prepare your lawn for spring growth.

These fertilizers are typically higher in potassium, which boosts cold hardiness. If your grass has already gone dormant, wait until early spring to apply any products.

Not sure if your lawn needs winter fertilization? WP Law can recommend a lawn care plan based on your grass type, soil, and property needs.

Keep Your Lawn Healthy Through the Cold Months

Grass may slow down or stop growing in winter, but your lawn still benefits from the right care and attention. Knowing when to mow, whether to seed, and how to fertilize sets the stage for healthy spring growth.

If you’re not sure what your lawn needs this winter, WP Law is here to help. Our team can assess your property, grass type, and irrigation system to create a seasonal care plan that works — so your lawn bounces back stronger than ever in spring. Get in touch with WP Law today to schedule your winter lawn evaluation or speak with a local expert.

Here’s How Short to Cut Grass Before Winter

how short to cut grass in winter

As fall comes to a close and temperatures drop, prepping your lawn for winter becomes essential. One of the most overlooked steps? Mowing. Cutting your grass to the right height before winter can make the difference between a lawn that bounces back in spring — and one that’s patchy, thin, or full of weeds.

Let’s break down how short to cut grass before winter, why it matters, and what to avoid.

What’s the Best Time to Mow in Late Fall?

The best time to perform your final mow is when your grass has nearly stopped growing, typically when daytime highs consistently fall below 50–55°F. For warm-season grasses like Bermuda or Zoysia, this could be late October or early November. For cool-season grasses like fescue or ryegrass, it may be mid to late November.

You want to give your lawn one last cut before it goes fully dormant — but not so early that it continues growing and becomes overgrown by winter.

Not sure when your grass is ready for its final mow? WP Law can help you assess your lawn’s condition and recommend a schedule based on your specific grass type and region.

Signs You’re Cutting Too Short

It’s tempting to go lower on your last mow, but cutting more than one-third of the blade height can cause shock. Common signs you’ve gone too short include:

  • Browning or yellowing tips
  • Patchy or uneven growth
  • Slower regrowth in spring
  • Increased weed invasion or bare spots

As a rule of thumb:

  • Cool-season grass: Final mow height should be 2.5–3 inches
  • Warm-season grass: Final mow height should be 1.5–2 inches

These heights protect the grass crown while preventing matting or moisture buildup over winter.

Does Mowing Frequency Change in Fall?

Yes — grass growth slows down as days get shorter and temperatures drop. While you may mow weekly in summer, fall mowing typically drops to every 10–14 days. Pay attention to growth, not the calendar. The goal is to avoid scalping the lawn or letting it grow too tall before winter.

You’ll also want to keep mower blades sharp and avoid mowing when the grass is wet or frosty, which can damage the turf and compact the soil.

Protect Your Lawn Now for a Greener Spring

Maintaining the right lawn height before winter helps set the stage for a healthy, green spring. If you’re unsure about when to cut, how short to mow, or whether your lawn needs additional prep like fertilizing or overseeding, WP Law’s team is here to help. We provide seasonal lawn care guidance and irrigation support tailored to your grass type and region.

Ready to prep your yard for winter? Connect with WP Law for expert advice and service you can count on.

South Carolina Weeds That May Be Killing Your Lawn

south carolina weeds

A lush, green lawn doesn’t happen by accident — especially in South Carolina, where heat, humidity, and fast-growing weeds can sabotage your turf before summer’s halfway through. If you’re noticing thinning spots, discolored patches, or stubborn plants popping up faster than you can mow them down, you might be dealing with more than just an untidy lawn.

Here’s how to spot, manage, and prevent the most invasive South Carolina weeds before they take control.

How to Identify South Carolina Weeds by Photo

The first step to controlling weeds is knowing what you’re up against. Some of the most common (and problematic) weeds found in South Carolina lawns include:

  • Crabgrass: Grows low and spreads fast, especially in compacted or bare soil.
  • Dallisgrass: Tall and clumpy, with thick seed heads — often confused with crabgrass.
  • Nutsedge: Bright green and quick-growing, with a distinctive triangle-shaped stem.
  • Spurge: A low, mat-like weed that thrives in dry, sunny spots.
  • Clover: Although it is sometimes left alone, it can take over large patches if left unchecked.

Using a weed identification guide or app, or consulting with a lawn expert, can help you determine which species are present, allowing you to treat them effectively.

Most Invasive Weeds in South Carolina Lawns

Some weeds aren’t just annoying — they’re aggressive invaders. Left alone, they can outcompete your grass for water, nutrients, and light.

Look out for:

  • Virginia Buttonweed – notoriously difficult to control and thrives in wet soil.
  • Carpetweed – spreads fast and smothers new grass.
  • Goosegrass – forms dense clumps and survives in poor soil.

These weeds are persistent and often require a targeted removal strategy, including both mechanical control (pulling or cutting) and chemical solutions.

Safe Ways to Remove Weeds in Grass Without Killing Turf

Weed control doesn’t have to mean harming your grass. The best approach combines timing, method, and product selection:

  • Use selective herbicides designed for your turf type.
  • Pull weeds when the soil is moist — the roots come up more easily and thoroughly.
  • Apply pre-emergent treatments in early spring to block weed seed germination.
  • Avoid overwatering or mowing too short, as this can stress the grass and create an environment that allows weeds to thrive.

If your lawn is full of weeds, it’s often better to treat small areas first and gradually restore healthy turf coverage.

Best Products for Southern Weeds and Lawn Care

The South’s long growing season means weeds are persistent, and your control products need to be as well. Choose herbicides and fertilizers tailored for the region’s conditions.

Some effective options include:

  • Crabgrass preventers (applied in late winter or early spring)
  • Broadleaf weed killers are safe for warm-season grasses
  • Organic options for lawns with kids or pets

WP Law can recommend region-specific products that support weed control while keeping your lawn healthy and safe.

Preventing South Carolina Weeds Before They Spread

The best defense against weeds is a strong, dense lawn. Prevention strategies include:

  • Mowing at the proper height to shade out weed seeds
  • Watering deeply but infrequently to encourage strong root growth
  • Fertilizing based on soil tests — not guesswork
  • Maintaining sharp mower blades for clean cuts that reduce stress on the grass

Once weeds take hold, they’re harder to remove. Getting ahead of them early in the season saves time and effort later.

A Weed-Free Lawn Starts with Smart Strategy

South Carolina’s climate creates the perfect environment for aggressive weeds, but with the right combination of identification, treatment, and prevention, your lawn can stay thick and healthy all year long.

Need help identifying weeds or choosing the right solution for your yard? WP Law’s team of turf care experts is here to help you diagnose, treat, and prevent weed issues with professional advice and proven products.

What is the Best Time to Water Grass?

Watering your lawn may seem straightforward, but the way you water makes a significant difference. The right timing can mean the difference between a lush, thriving yard and one that struggles with shallow roots, disease, and wasteful runoff. Whether you’re a homeowner or a commercial property manager, knowing the best time to water grass is key to maintaining a healthy lawn year-round.

Why Early Morning Is the Best Time to Water Grass

Begin watering as close to sunrise as possible.  This is considered the ideal window for watering grass. During this time, the air is cooler, the wind is calm, and the sun hasn’t fully risen. This allows the water to absorb into the soil rather than evaporate.  Beginning irrigation too early may foster fungal diseases.

Morning watering also helps prevent fungal diseases, which can develop when grass remains wet overnight. Watering early gives blades enough time to dry before the evening, protecting your lawn from moisture-related issues.

What Happens If You Water Grass at Night?

While watering at night might seem convenient, it can create problems. Without sunlight to evaporate excess moisture, your lawn stays damp for longer periods, especially in humid regions like South Carolina.

This prolonged moisture invites fungal growth, including dollar spot, brown patch, and mold. If morning watering isn’t possible, late afternoon (around 2 PM to 5 PM) is your next best option — early enough for the grass to dry before nightfall.  This works well if the cycle and soak technique is practiced using multiple start times during the day.

Best Time to Water Lawn for Maximum Absorption

Beyond the time of day, water absorption depends on how deeply the moisture penetrates. Aim to water deeply enough that moisture soaks 4–6 inches into the soil, encouraging deep root growth.

Insufficient irrigation during the day leads to shallow roots, making your grass more susceptible to heat and drought. Sticking to an early, deep watering schedule not only conserves water but also strengthens your turf over time.

Smart Timers and Water Sprinkler Systems That Help

If you don’t want to wake up early to water your lawn manually, automated systems can handle it for you. Smart sprinkler systems and timers enable you to schedule watering based on the time of day, soil moisture, and even local weather conditions.

WP Law offers expert guidance on designing and installing yard sprinkler systems that eliminate the guesswork from lawn care, making your irrigation smarter and more efficient.

Adjusting Lawn Watering Schedules for Summer Heat

In summer, grass needs more water due to increased evaporation and stress. Stick to early morning watering, but you may need to slightly increase the duration or frequency — especially during heatwaves or dry spells.

Watering multiple times a day may be necessary, depending on whether you are establishing new turf from grass seed, sod, or for established lawns, or adjusting for soil types. Remember that overwatering can be just as harmful as underwatering.

Timing is Just as Important as Technique

Getting the timing right can make your lawn greener, healthier, and easier to maintain. By watering early, adjusting for seasonal conditions, and using the right tools, you give your grass what it needs to thrive.

If you’re ready to improve your watering routine or upgrade your sprinkler system, WP Law is here to help.  Contact us today to schedule your consultation or appointment. 

How Long Should You Water Your Yard?

water your yard

Summer heat can be tough on lawns. Too little water and your grass dries out. Too much, and you risk fungus, disease, or shallow root growth. So, how long should you water your yard? The answer depends on your soil type, sprinkler system, and even the time of day.

Here’s what you need to know to properly water your yard and keep your lawn green and thriving all summer long.

The Right Duration to Water My Lawn in Summer

As a general rule, your lawn needs about 1 to 1.5 inches of water per week, either from rainfall or irrigation. That usually breaks down to watering approximately 4 hours per week for rotor heads and 1.5 hours per week for misting (spray) heads, two to three times a week, depending on your local climate.

Quick test: Place a shallow can or rain gauge in your yard during watering. Once you’ve collected ½ inch, stop and use that as your guide for future sessions.

If you’re using smart irrigation systems, many can track local rainfall and soil moisture to automate this process with precision.

How Soil Type Affects Lawn Watering Time

Different soils absorb and retain water differently:

  • Sandy soils drain quickly and need shorter, more frequent watering.  Use the cycle and soak technique to prevent water waste and promote the development of deep roots.
  • Clay soils retain water but can take longer to absorb, so water should be applied slowly and less frequently.  Again, think about using the cycle and soak technique.
  • Loamy soils (a mix of sand, silt, and clay) are ideal, needing moderate watering times and frequency.

Knowing your soil type is crucial for creating an effective watering schedule that minimizes waste and promotes healthy root development.

Best Sprinklers for Lawn Coverage

Your sprinkler system directly impacts how evenly and efficiently water is applied. Here are a few options to consider:

  • Rotary sprinklers are best for large areas and deep watering.
  • Fixed spray heads are ideal for smaller, uniform spaces.
  • Drip irrigation works well for flower beds and garden borders.
  • Smart controllers connect to apps or timers for more efficient scheduling and zone control.

If your lawn has dry patches or pooling, it might be time to upgrade or adjust your sprinkler heads. WP Law offers consultations to evaluate and fine-tune your lawn sprinkler system.

Signs You’re Overwatering or Underwatering Your Yard

Is your lawn getting the right amount of water? Watch for these signs:

Overwatering:

  • Mushy soil or standing water
  • Yellowing grass or fungal spots
  • Increased weed growth

Underwatering:

  • Crunchy or wilted grass
  • Bare patches or slow growth
  • Footprints remain visible on the grass

Correcting these signs early can prevent long-term damage and unnecessary water waste.

Tips for Setting a Smart Lawn Sprinkler System Schedule

To maximize water efficiency and lawn health:

  • Begin watering early in the morning before sunrise:  This reduces evaporation and helps prevent disease.  However, this is climate-dependent, so adjust irrigation run times and frequency accordingly.
  • Avoid watering at night: Moist grass can promote fungus growth.
  • Check zones regularly: Ensure even coverage and adjust as grass grows or seasons change.
  • Install a rain sensor or smart timer: These tools automatically pause watering when sufficient rainfall is detected.

WP Law can help you design or upgrade your irrigation system to suit your lawn’s unique needs, conserving water in the process.

Trust WP Law for Smarter Lawn Watering Solutions

Watering your yard isn’t just about keeping grass green—it’s about doing it efficiently and sustainably. Whether you’re using manual sprinklers or want to upgrade to a smart lawn sprinkler system, WP Law has the tools, technology, and expertise to help.

Contact WP Law today to book a consultation and keep your lawn thriving all year long.

Stay Connected

Sign up today to keep up with the newest information from one of the Southeast’s leading suppliers of fluid handling equipment!

Interested In